
Planning to visit Kenya soon? Whether you’re going on an African safari or hitting the beaches of Mombasa, if you’re traveling to Kenya for tourism, you’ll probably need a KENYA ETA, sometimes referred to as an eVisa! In this article, we’ll show you exactly how to get one.
We have just recently wrapped up our great African safari tour and one of the countries we visited was Kenya. We can give you a thousand reasons why you should consider Kenya for your next adventure. The safari, the stunning landscapes, and the rich cultures — all these will leave you in awe. But here’s one more reason: It’s so easy to get a Kenya ETA.
An ETA is an electronic travel authority. All foreigners visiting Kenya — except those who are citizens of member states of the East African Community (EAC) Tanzania, Burundi, Rwanda, Uganda, South Sudan, and the Democratic Republic of Congo — need to get one to enter the republic.
But don’t worry. It’s super easy to get, even for Filipino tourists. No need for a mountain of paperwork or long embassy appointments. You can apply for it entirely online. Here’s a quick DIY guide on how to apply for a Kenya eVisa (ETA).
Step 1: Complete the requirements.
The following are the main requirements.
- Passport – Make sure it’s valid for at least six months. You’ll be uploading a quick scan or photo of your passport’s info page at one point during the process.
- A recent passport-size photo – No hats or sunglasses. Or you may take a selfie at one point of your online application.
- Return flight booking confirmation – They want to make sure you’re coming back and not overstaying in Kenya, so have a copy of your return flight details handy.
- Proof of accommodation – You’ll need to upload proof of where you’re staying. A PDF or screenshot works. If you’re a tourist, you may submit a hotel booking confirmation. If you’re pulling a DIY, you may book your hotel online. We stayed at Ibis Styles Nairobi Westlands. Find more Nairobi hotels here!
If you’re availing of a tour package from a travel agency, chances are, visa processing and accommodations are already included, so make sure you ask your contact first. One of the agencies offering Kenya Safari Tours is Constellation Travels, Inc., one of the most established travel institutions in the Philippines. If you’re more interested in convenience and you do not want to take care of all the meticulous planning and paperwork, get in touch with them and ask for a Kenya safari quote. Here are their contact details:

To clarify, our Kenya safari tour was NOT sponsored by Constellation Travels. We booked our safari with a Kenya-based agency and paid in full. But if you’d rather deal with a local agency, this is an option for you.
But depending on your nationality, purpose of travel, and other factors, you may be asked to upload more documents.
Citizens/residents of certain countries may also be required:
- Financial assets or bank statements
The following may also be required:
- If attending a conference: invitation to the conference or proof of conference
- If traveling for business: Invitation letter from the company and copy of business registration of the company
- If visiting family in Kenya: Invitation letter and ID/Passport/Alien card/Entry permit of the host
But for me, a Filipino traveling to Kenya for tourism purposes, the main four (4) were all they required from me.
Once you have all the requirements, it’s time for Step 2.
Step 2: Create an ETA Kenya Account.
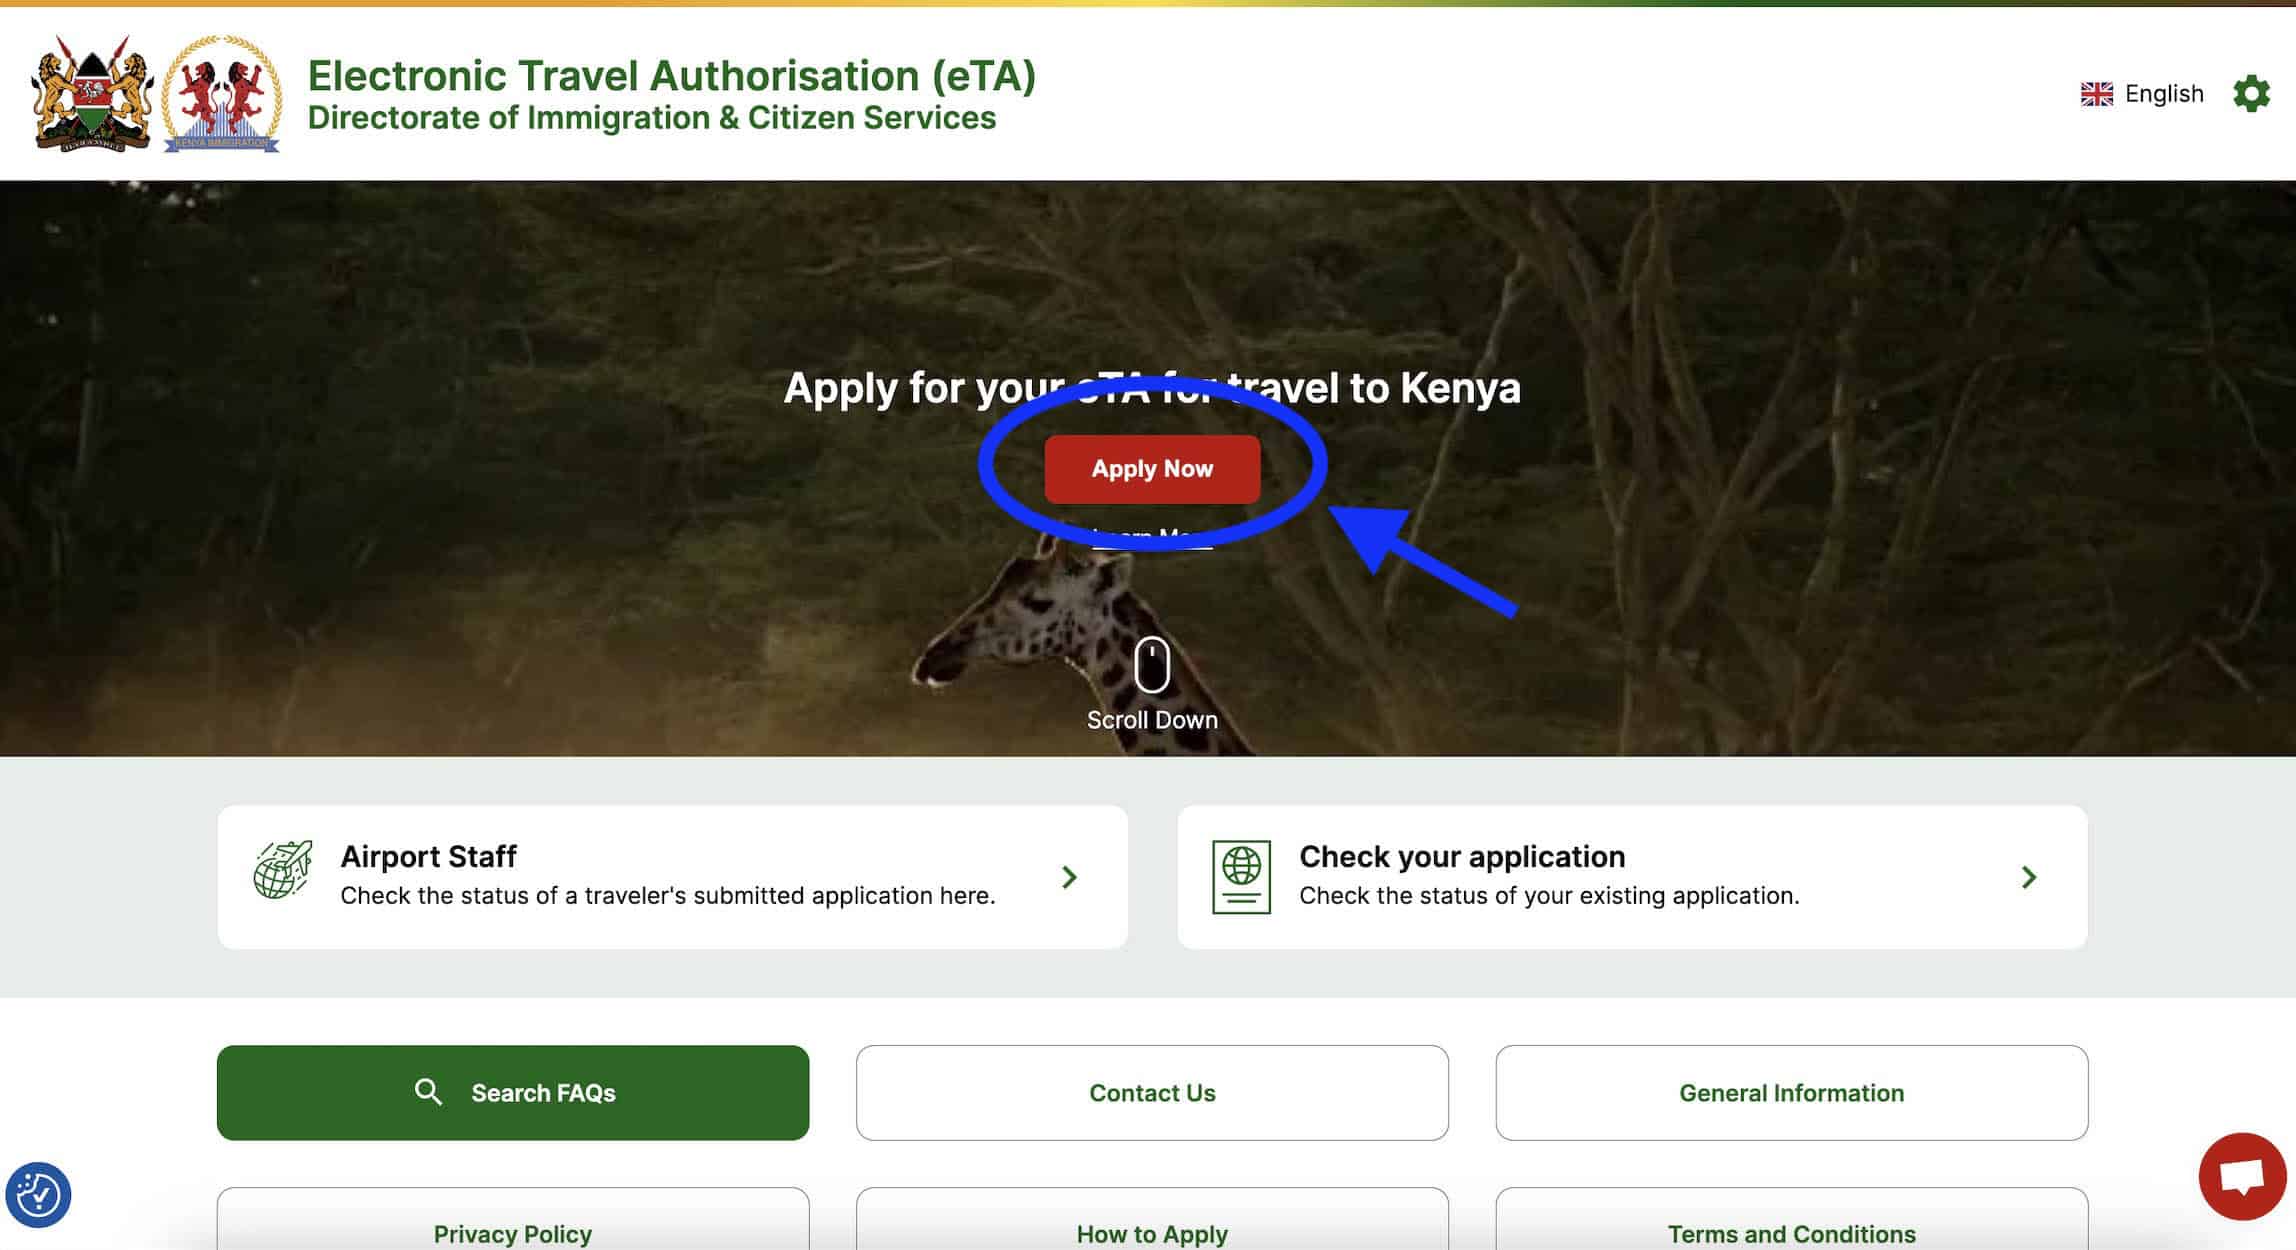
To do that, just visit this page. Click on the red APPLY NOW button and then on the next pop up, select TOURIST & VISITORS.
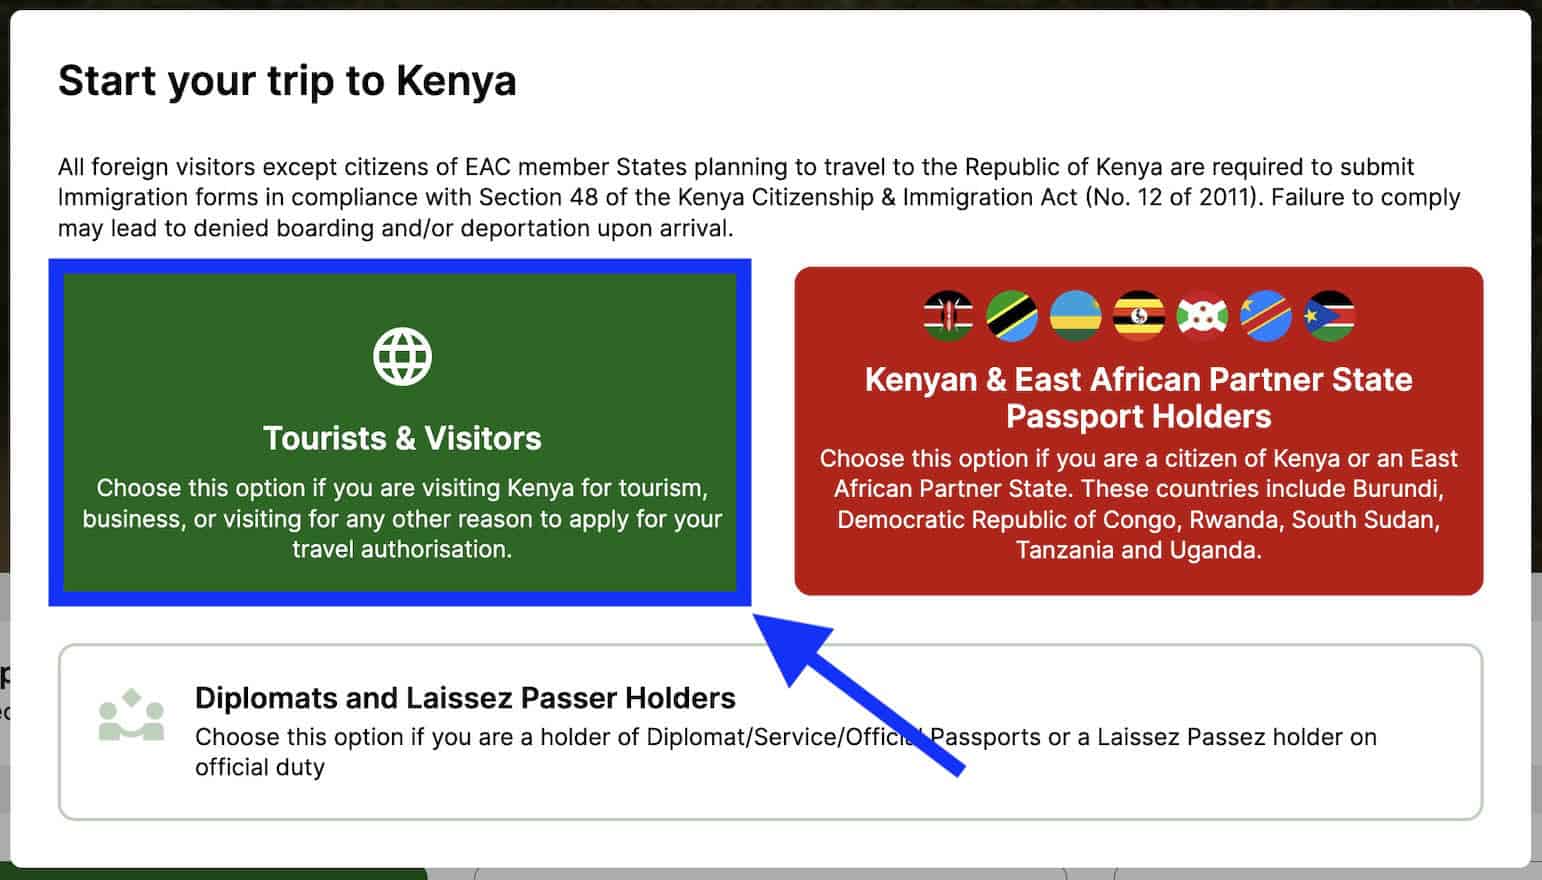
On the “Declaration” popup, tick the boxes and select CONTINUE. Then select whether you’re applying just for yourself (INDIVIDUAL APPLICATION) or as part of a group (GROUP APPLICATION).
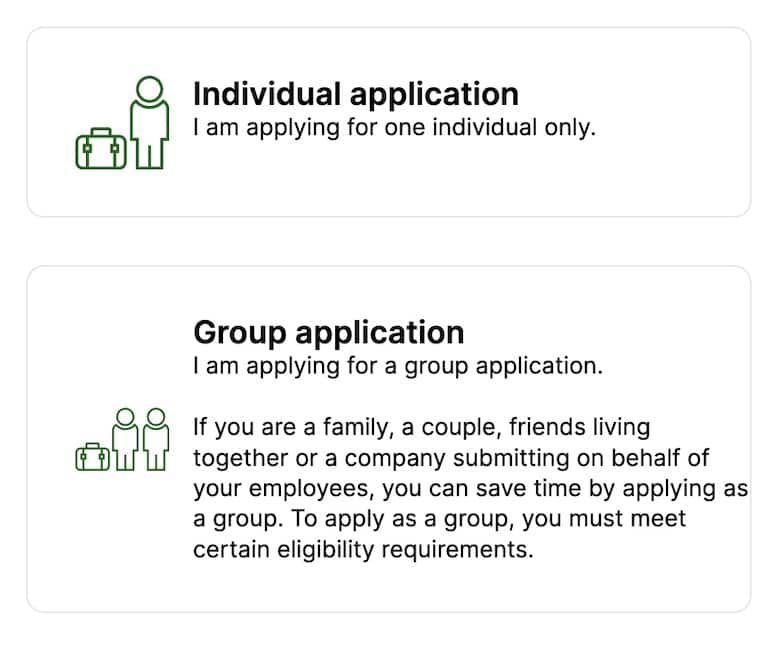
Group application is allowed for family, couple or friends traveling together in a group of six or smaller, but you all must be:
- Residing in the same country
- Traveling to Kenya for the same purpose
- Sharing the same accommodation and travel itinerary for your entire stay in Kenya
Click CONTINUE.
Step 3: Fill out the application form.
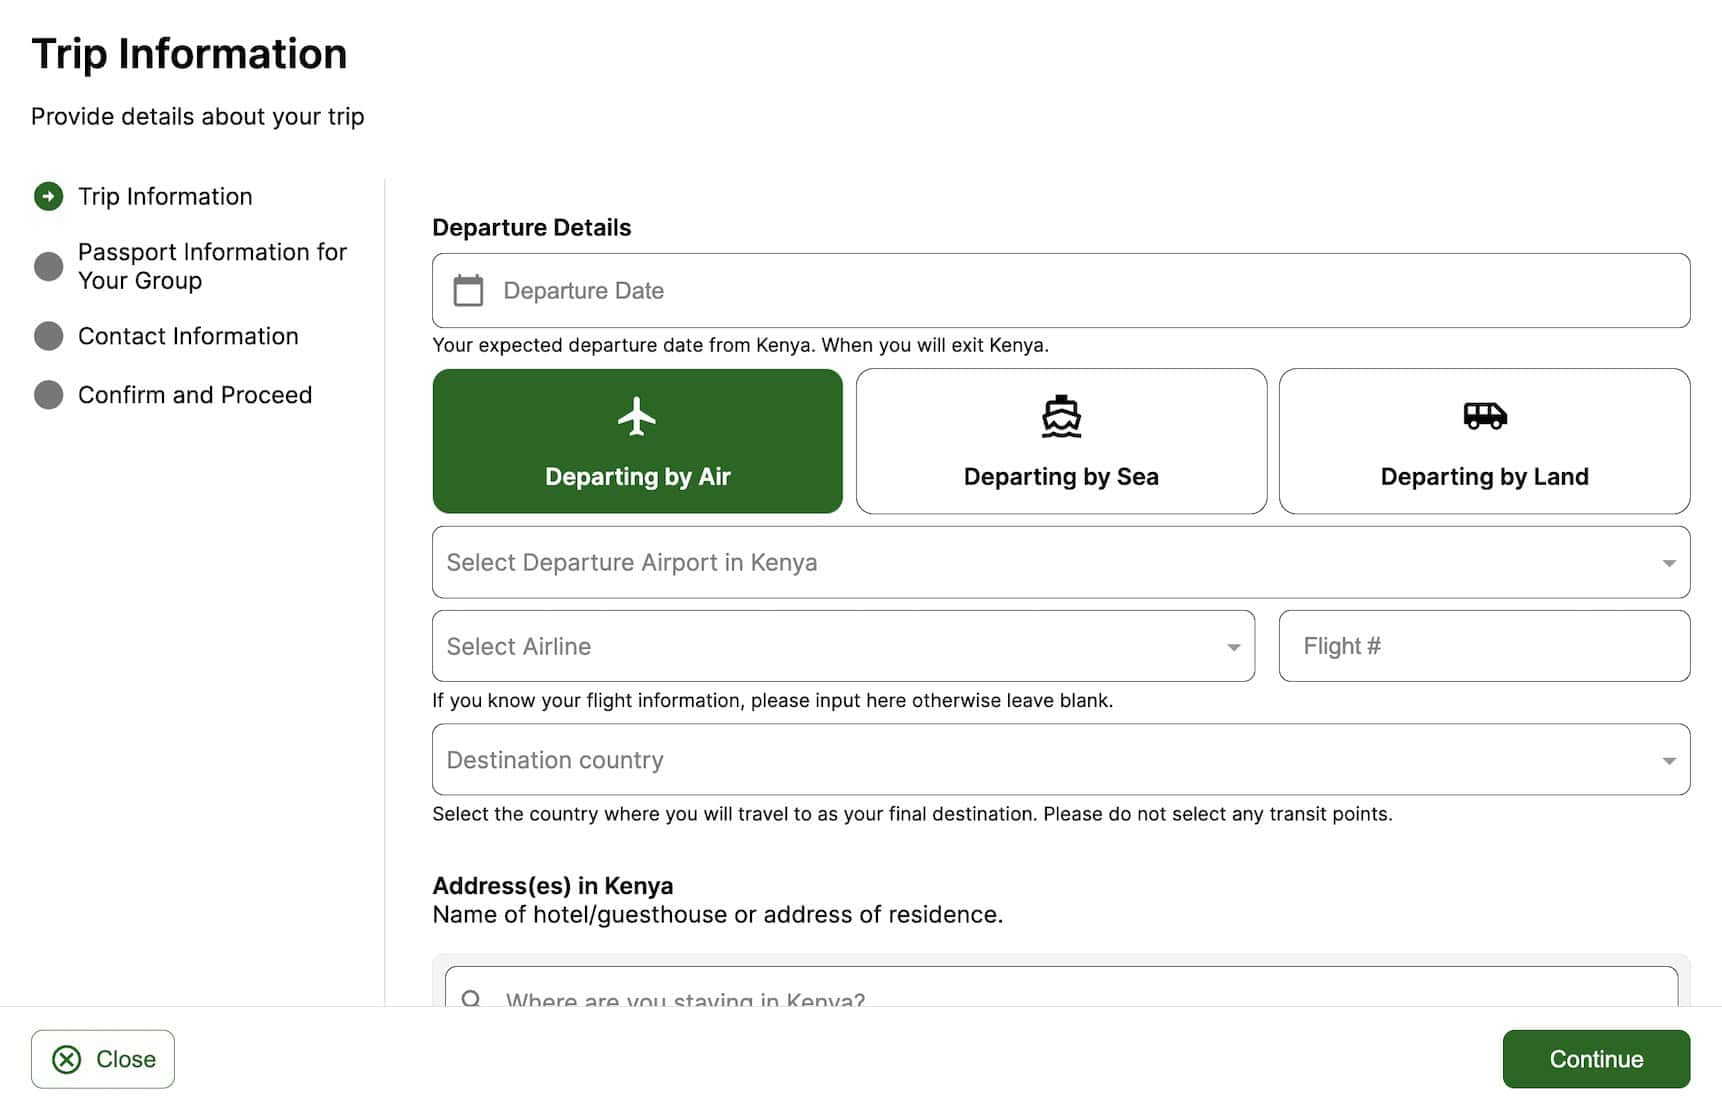
You’ll need to provide your travel details including:
- Purpose of travel
- Travel dates
- Airline and flight number
- Address in Kenya, which can be the address of the hotel you booked
Step 4: Upload your passport scan and photo.
After uploading a scanned copy of your passport, the system will automatically extract the text from the image. Make sure these text details are correct before moving on.
You’ll then be asked for a photo. You have an option to upload a recent passport-size photo or just take a selfie. Whatever you choose, make sure your face is clear.
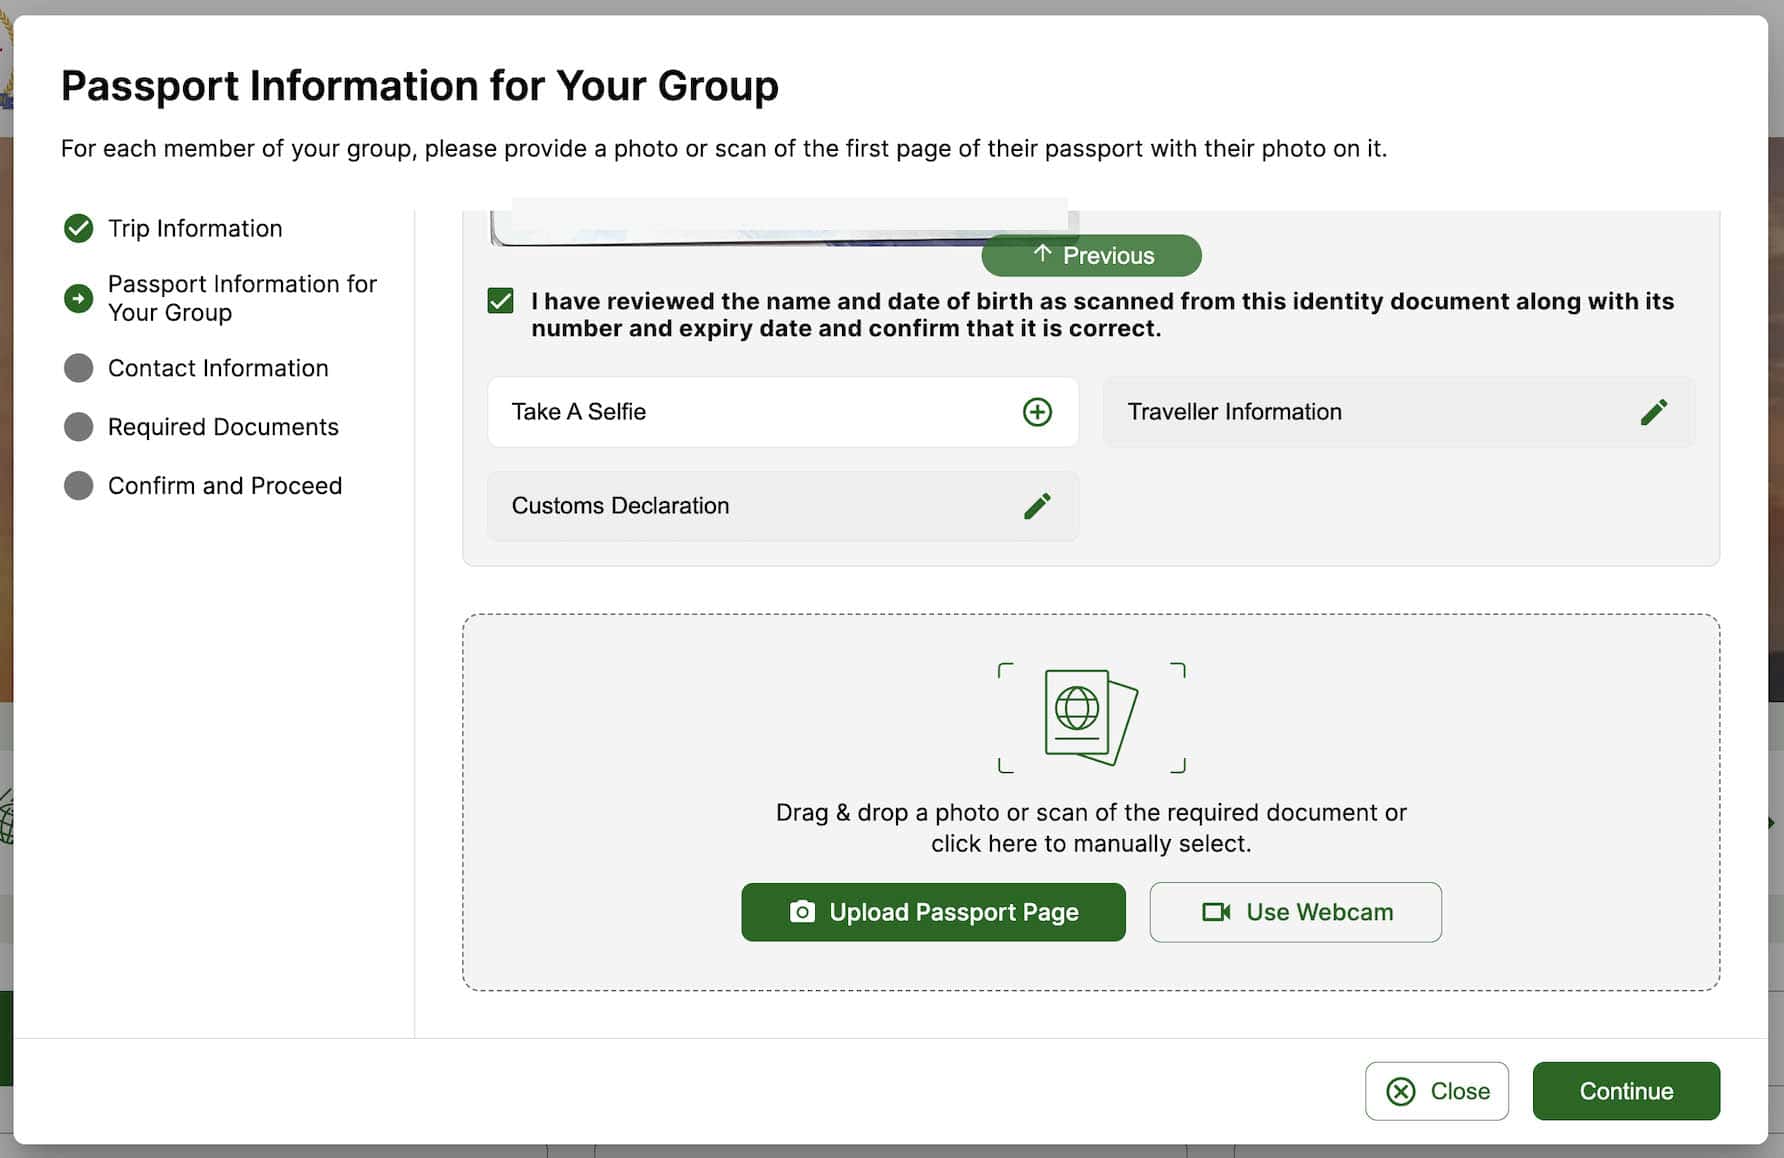
I had a hard time here. I first tried uploading a photo but it won’t accept it, so I ended up just taking a selfie but I also ran into a number of errors. Took me a while before it finally accepted my selfie.
Step 5: Provide contact information and customs declaration.
It’s pretty straightforward. Just enter your own and your emergency contact’s details and answer the questions truthfully.
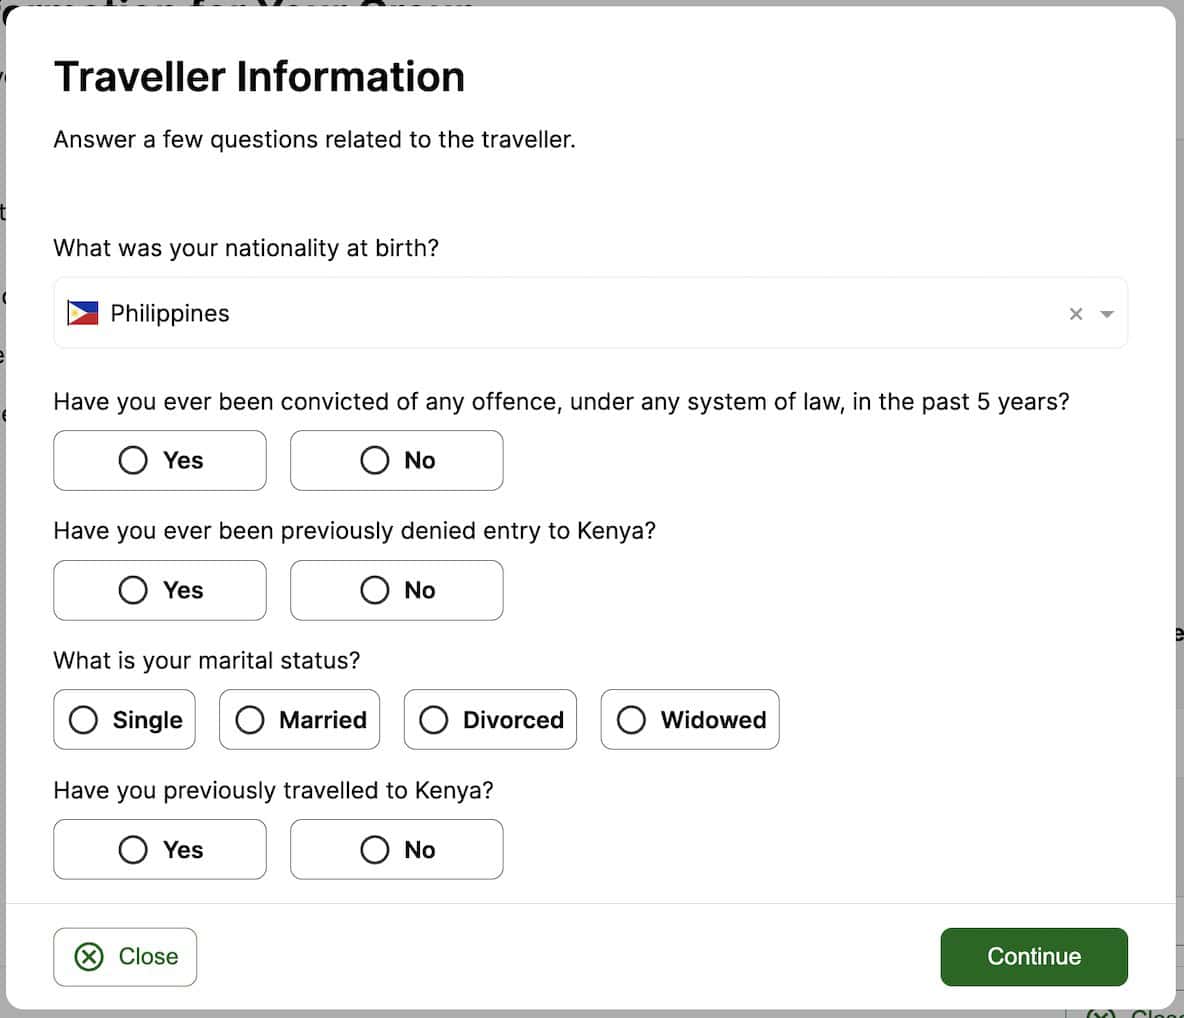
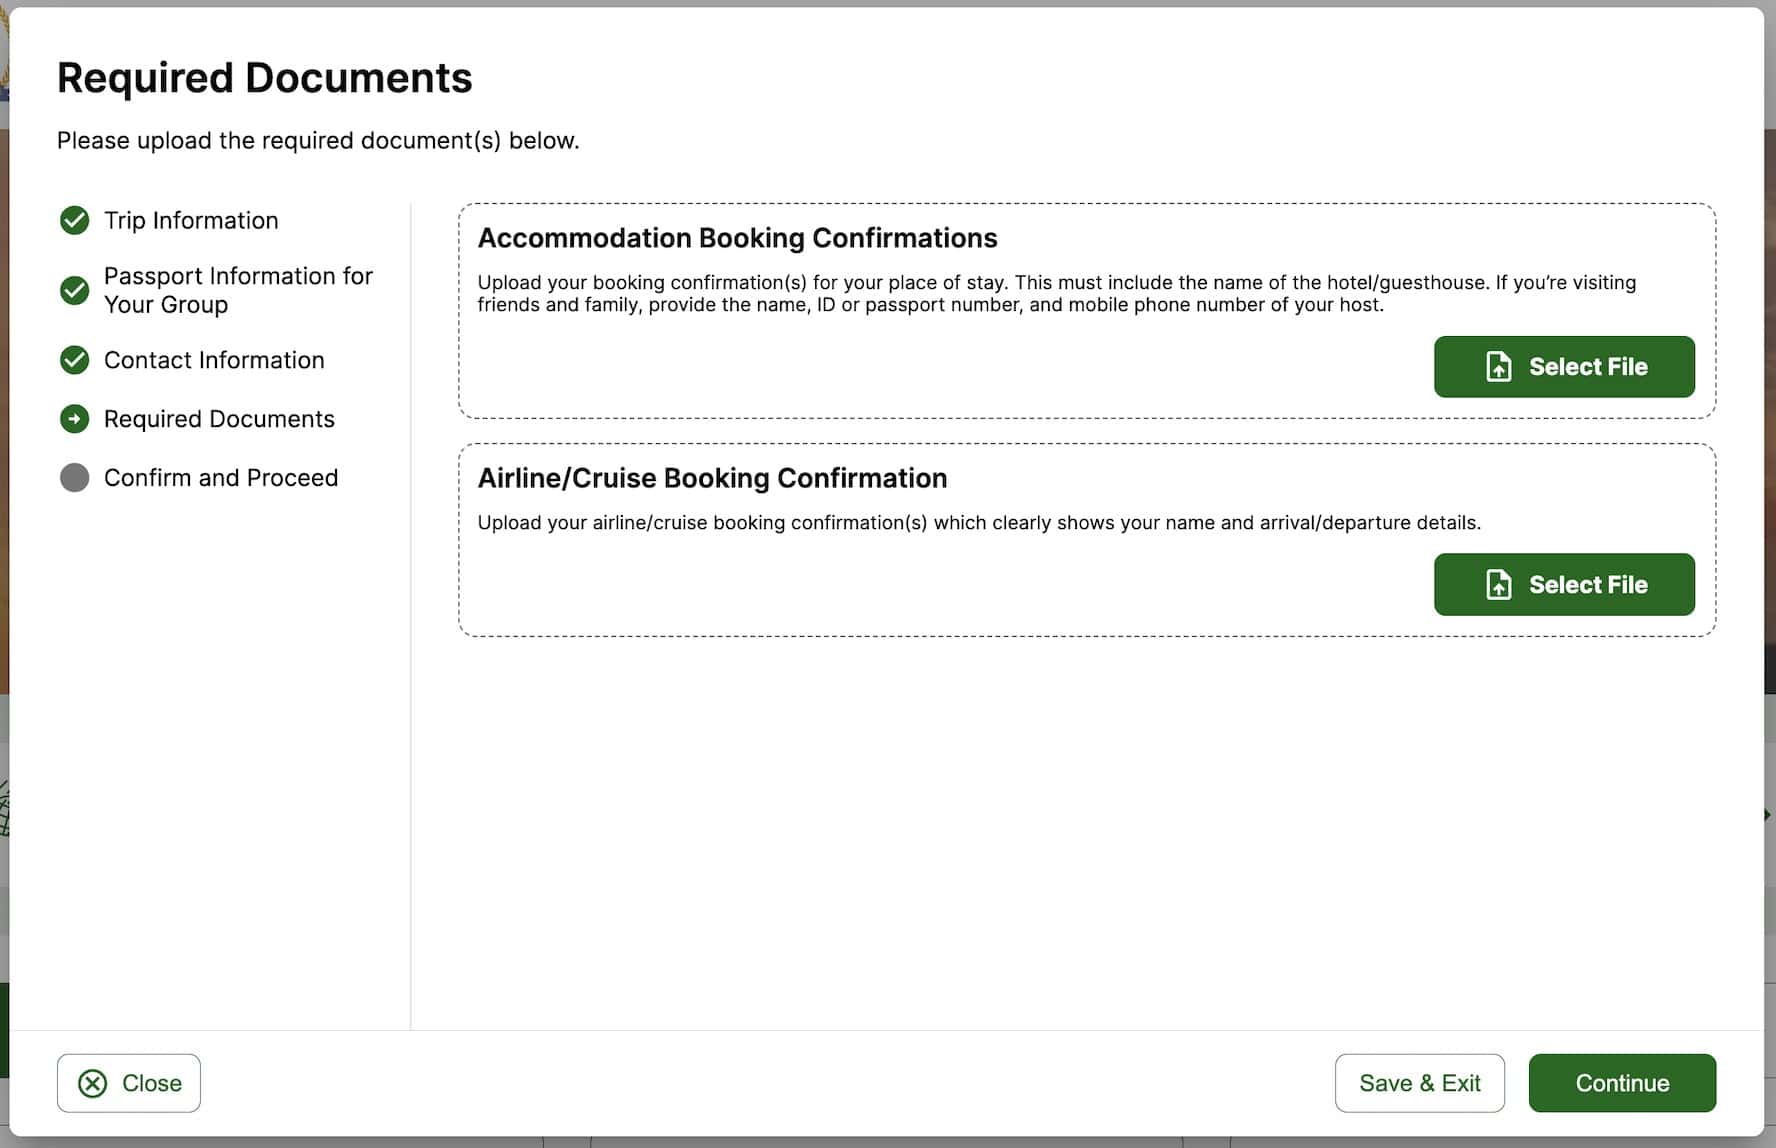
Step 6: Upload flight and accommodation booking.
If you’re staying at a hotel, your confirmation must indicate the name of the hotel. If staying with friends and family, you’ll be asked to provide your host’s name, ID or passport number, and mobile number.
For the flight confirmation, your name and arrival and departure details must be clearly visible.
Step 7: Submit and pay for your application.
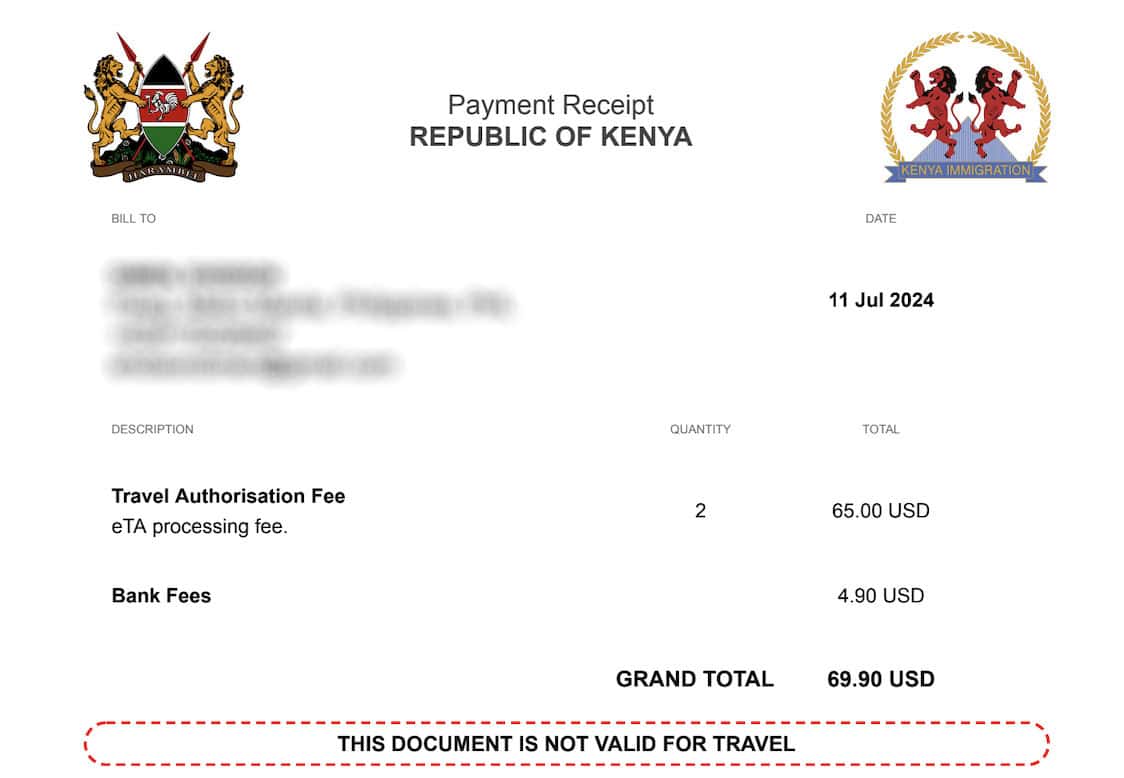
Standard processing costs USD 30 per application plus other fees.
In our case, for two (2) applications, we paid a total of USD 69.90 including bank fees.
You may use a credit card to pay.

After payment, you should immediately receive two documents by email: a confirmation that the system has received your application and a payment receipt. Note that these are NOT your visa/ETA yet.
ETA processing usually takes around 72 hours. But it can take longer in some cases. Like mine. Ours took 4 days. We submitted our application at around noon of July 11, and got the result and the ETA just past midnight of July 15.
Step 8: Download and print your ETA.
Fold it along the provided lines. You’ll need to show this at immigration when you land in Kenya, so keep a copy of it at all times.
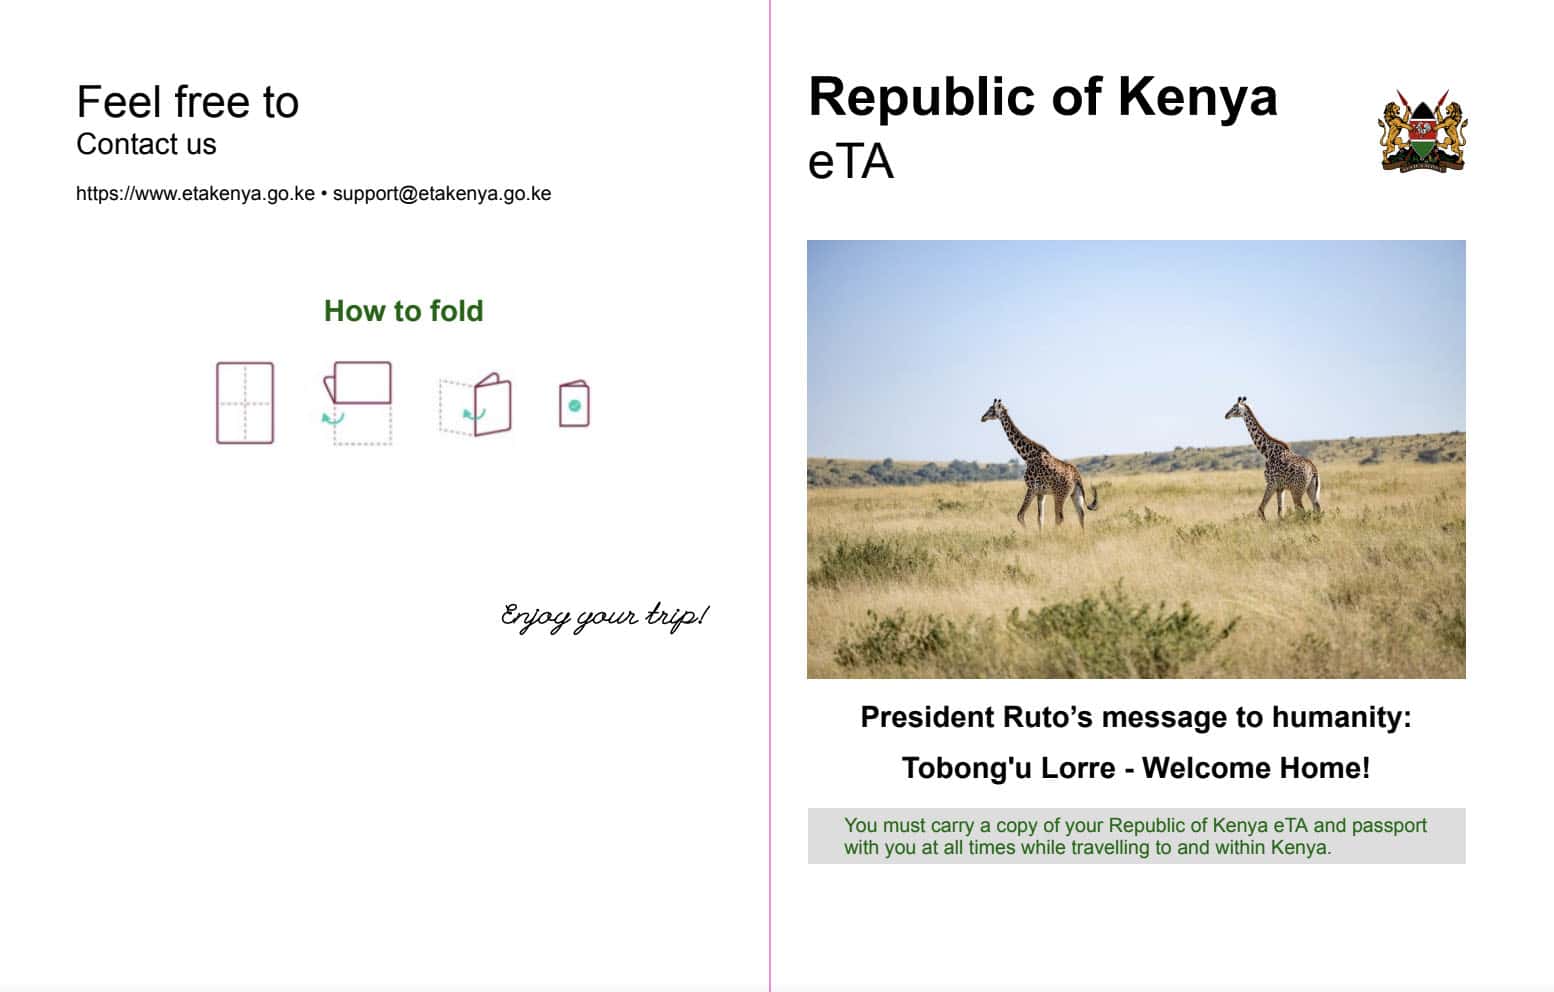
And that’s it! Super simple, right? You’re all set to experience Kenya’s stunning landscapes, wildlife, and culture.
That’s all for now. Remember, plan smart, travel safe, and make every trip WORTH IT!


